Skin retouching
How to Retouch Skin Without Losing Texture: The Olune Skin Workflow
A fast, natural skin-retouching workflow using Olune Skin to clean distractions, preserve pores, and protect the original light in Photoshop.
Open the portrait. Zoom to 100%. Do not touch the skin yet.
First, zoom back out.
What pulls your eye from the expression: one blemish, uneven foundation, a bright patch, a dark under-eye transition? That is the problem. The hundreds of pores you noticed at 100% are not.
Olune Skin is designed around that distinction. It can prepare the layers, select the skin, and load the working brushes in seconds. It does not ask you to smooth everything. You decide whether the file needs Healing, Smoothing, Texture, or no correction at all.
Here is a complete workflow for getting from the first look to a finished portrait without sanding away the person.


Minute 0–3: Make the raw file honest
Set exposure, white balance, highlight recovery, and broad color before detailed retouching.
Watch the red and orange channels. Too much saturation can turn normal variation into a “skin problem” that never existed. Protect highlight detail, especially on the forehead, nose, and cheek. Frequency separation cannot rebuild light that was clipped in the raw conversion.
The goal is not a finished image. It is a balanced file that tells you what actually needs work.
Minute 3–6: Separate temporary from personal
Create a blank cleanup layer. Remove the things that belong to the day, not the person:
- Active blemishes
- Makeup flakes
- Lint or dust
- Small shaving cuts
- Stray hairs crossing the face
Slow down around freckles, scars, moles, expression lines, and natural under-eye structure. If a mark would still be there next month, soften it before you erase it.
Use a brush only slightly larger than the distraction. Sample close. One short correction, one new sample. Large copied texture patches are easy to see and hard to unsee.
Minute 6–8: Build the right Olune Skin setup
Choose the mode that matches the job:
- Auto: the fast route. Olune creates the FS stack, detects skin, and activates the brush.
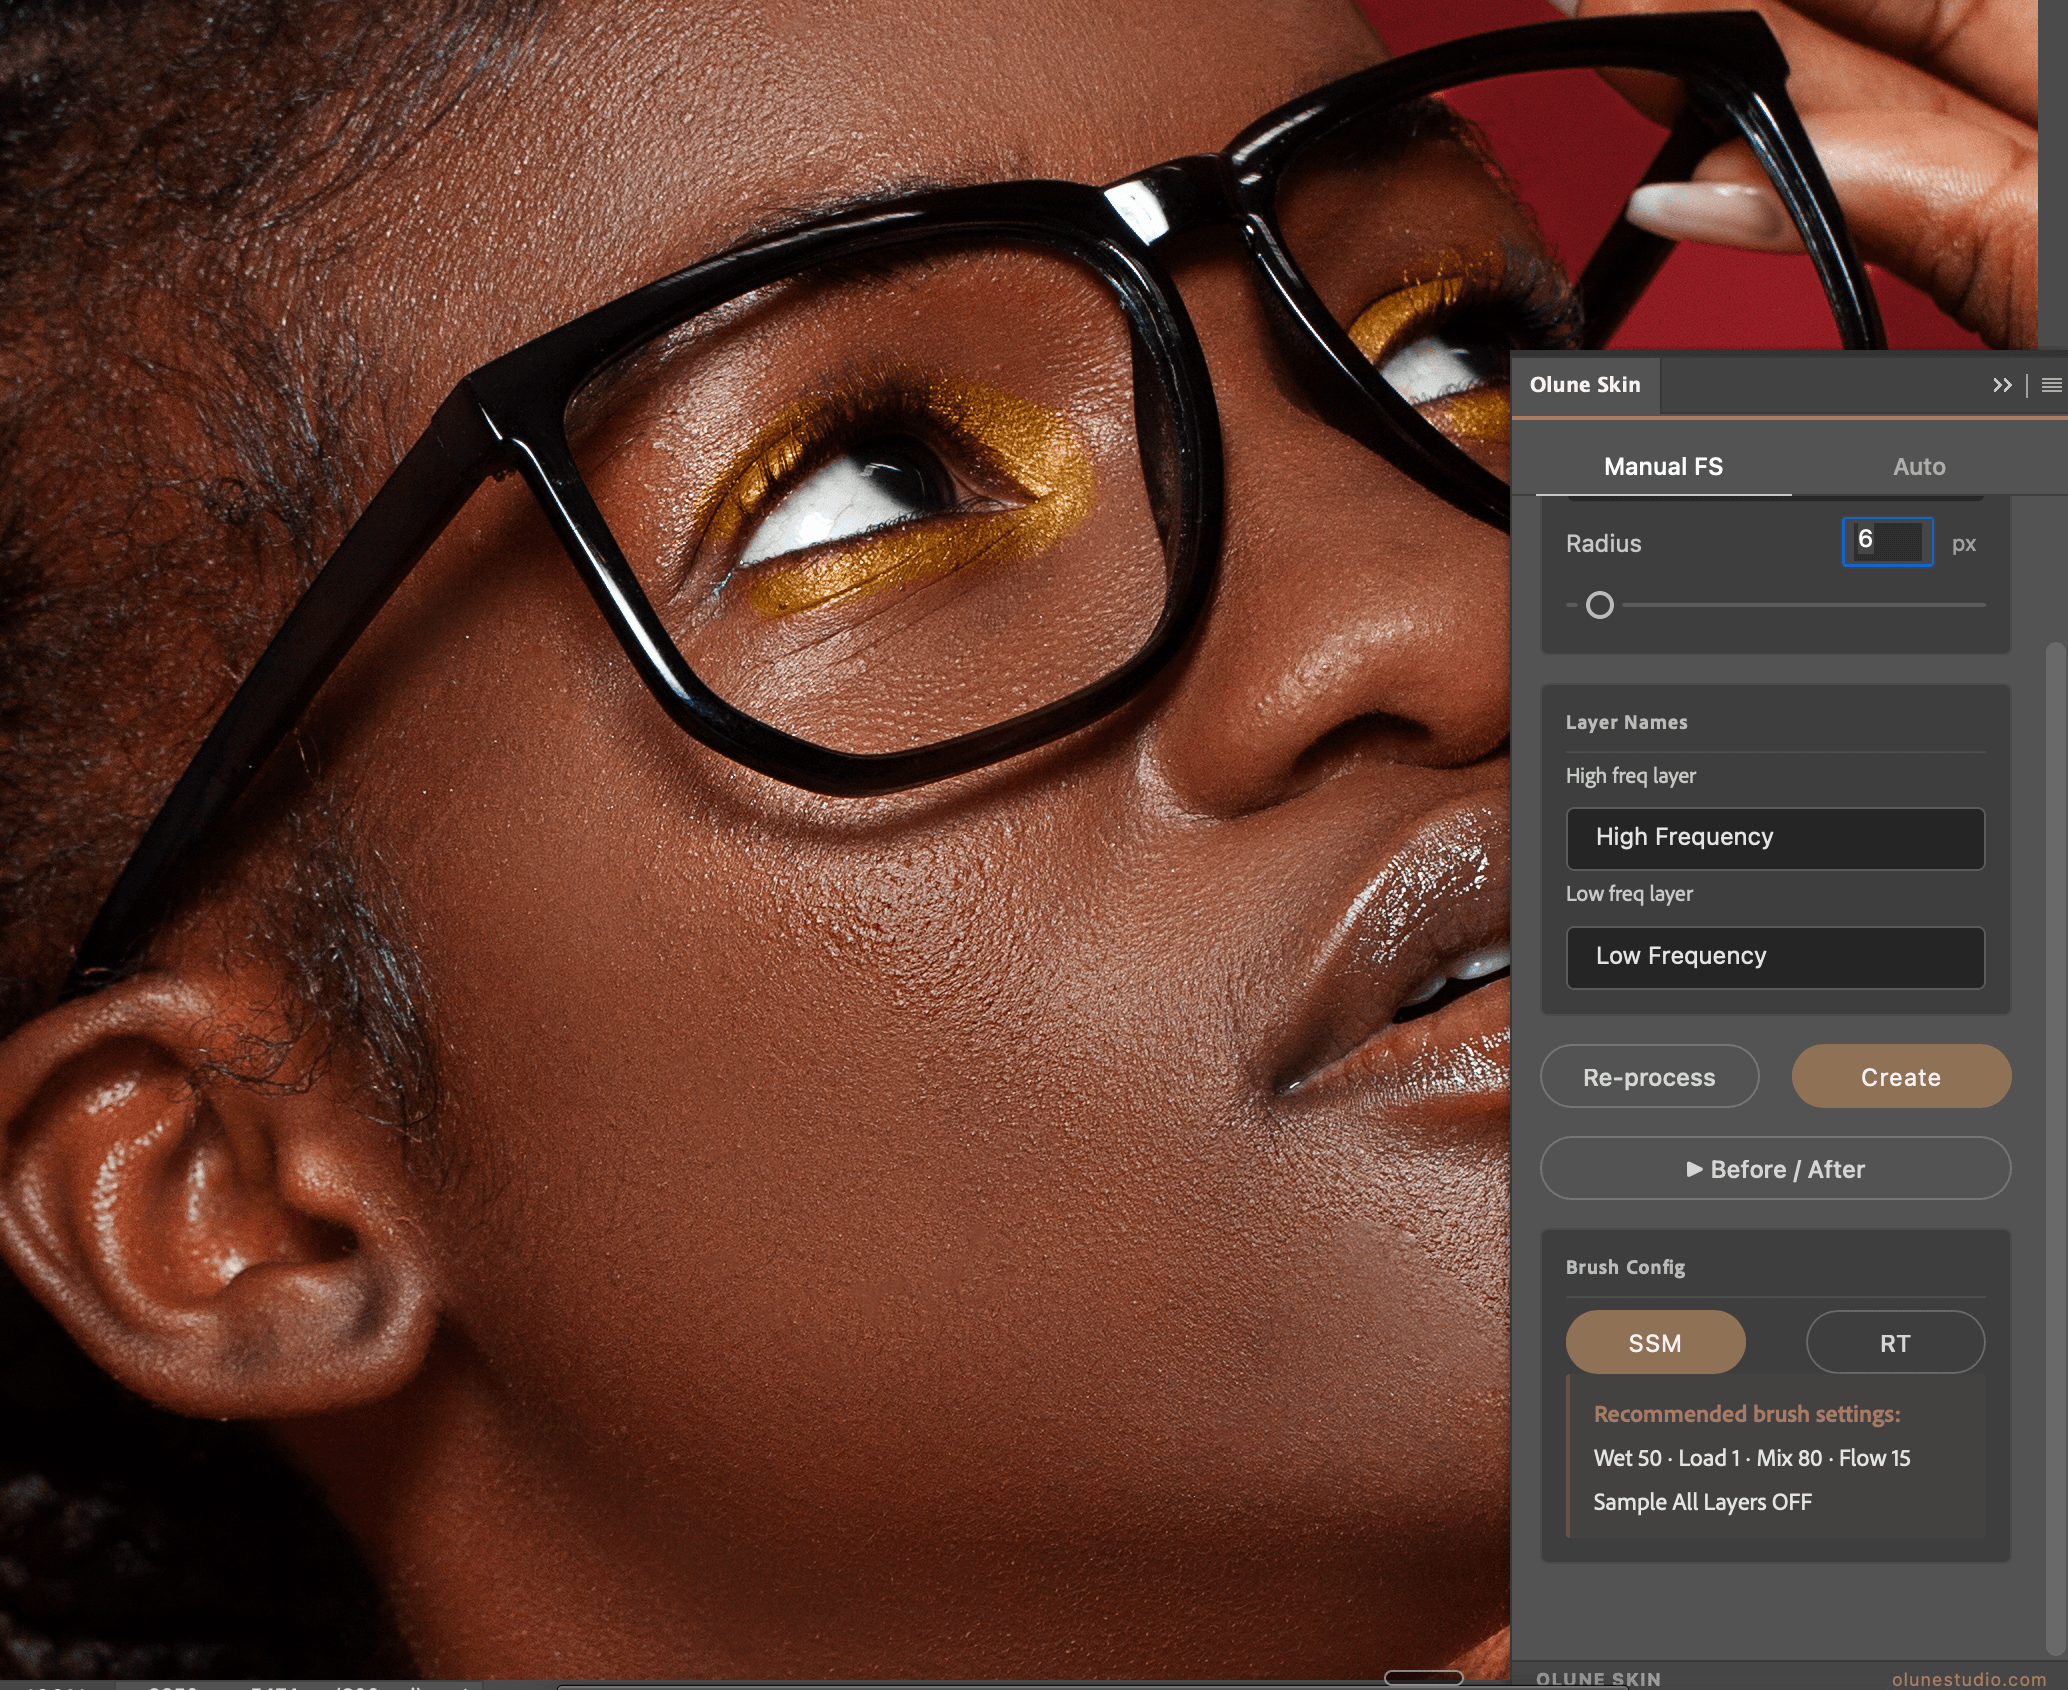
- Manual FS: the controlled route. Choose Gaussian, Surface, Median, or 2× Median; set a 1–100 px radius; customize layer names; use the prepared SSM and Reveal Texture brushes.
For a hero beauty close-up, start Manual. For a clean portrait set on a deadline, Auto may be the better first move.
Whatever you choose, inspect the radius. Increase it until fine pores leave the low-frequency preview, then stop before important facial edges dissolve. Olune’s Re-process control lets you change the radius without rebuilding the stack.
Use this workflow on your own file
Try every Olune Skin feature free for 14 days. No card required, and the trial is the complete plugin — not a stripped-down demo.
Minute 8–13: Fix the scale where the problem lives
This is the decision that keeps texture alive.
If it is texture, use Healing
A damaged pore cluster, short hair, or makeup flake belongs on the cleanup or high-frequency layer. Keep the correction small and match the texture direction of that exact area.
If it is color, use Smoothing selectively
Redness, a green shadow patch, or uneven foundation lives lower in the image. Use short SSM brush strokes inside one facial plane. Follow the cheek. Stop before the nose, jaw, lips, and highlight edges.
If it is shape, leave frequency separation
A dark hollow, bright bump, or broken light transition is usually better handled with dodge and burn. Olune Skin speeds up frequency separation; it does not turn every retouching problem into frequency separation.
That restraint is what prevents the plugin look.
Minute 13–16: Protect the edges
Olune Skin uses Photoshop’s native face-mesh engine to prepare a skin selection. Treat it as a fast starting point, not a blindfold.
Inspect the mask around:
- Eyelashes and eyelids
- Eyebrows and hairline
- Lips and nostrils
- Facial hair
- Jewelry
- Hard shadow boundaries
Remove any spill, then paint the Smoothing, Healing, and Texture masks independently. A cheek may need smoothing while the nearby freckles need texture restored. One global mask cannot describe both decisions.
Minute 16–18: Put texture back where you went too far
The cheek looks suspiciously perfect. Now what?
Do not smooth the forehead to match it.
Use Olune Skin’s Reveal Texture brush at low flow. Paint back the natural surface gradually, or reduce the correction layer opacity. If the patch still looks wrong, erase the correction and redo a smaller area.
Non-destructive retouching makes changing your mind cheap. Use that advantage.
Minute 18–20: Run the three-distance check
Use Olune Skin’s inline Before/After while changing zoom:
100% — Is the technique clean?
Look for repeated pores, soft patches, hard mask edges, and healing artifacts.
50% — Does one area look strangely perfect?
Compare the cheek, forehead, nose, and jaw. They should not share identical texture.
Fit-to-screen — Is it still the same photograph?
Judge expression, light, volume, and attention. If the face became flatter or the retouch is the first thing you notice, reduce the group opacity.
The five mistakes Olune cannot save you from
Even a fast setup will not fix a bad decision:
- Choosing a radius by habit.
- Painting across facial planes.
- Treating every permanent feature as damage.
- Smoothing the whole skin selection at one strength.
- Working at 200% until the person becomes a collection of defects.
Olune Skin removes the repetitive setup so you have more attention for those decisions. That is where the speed comes from: fewer clicks, fewer rebuilds, and a clear place for each correction.
Try the 20-minute test
Choose a real client file. Set a 20-minute timer. Work through this order once, then compare the result with your normal process at 100%, 50%, and fit-to-screen.
Download Olune Skin and start the free 14-day trial. Use Manual on one image and Auto on the next. The faster mode is the one that gives you a believable finish with fewer corrections — not simply the one that creates more layers.
Clean what is temporary. Protect what is personal. Stop while the skin still feels alive.