Skin retouching
High vs. Low Frequency: The Olune Skin Retouching Cheat Sheet
Stop guessing which frequency to edit. Use this Olune Skin cheat sheet to place pores, redness, wrinkles, and tonal transitions on the right layer.
You see a blemish. Which layer do you touch?
“High frequency is texture. Low frequency is color” sounds like an answer, until the blemish has a sharp edge, broken pores, a red halo, and a dark ring.
The useful answer is: do not retouch the blemish. Retouch its parts.
Olune Skin makes those parts easier to reach by building the separation, naming the layers, preparing the brushes, and keeping Smoothing, Healing, and Texture independent. This cheat sheet tells you where to work once the stack exists.
Save this table
| What you see | Start in Olune Skin | Why |
|---|---|---|
| One damaged pore or small flake | Healing / High Frequency | The problem is fine texture |
| Red halo around a blemish | Smoothing / Low Frequency | The texture may already be fine |
| Raised red blemish | Healing, then Smoothing | It contains texture and color |
| Blotchy cheek or foundation | Smoothing / Low Frequency | The variation exists at a broad scale |
| Dark under-eye hollow | Dodge & Burn outside FS | The problem is shape and luminosity |
| Fine hair across the cheek | Healing / High Frequency | Remove it without blending skin color |
| Soft patch after retouching | Reveal Texture | The correction removed local detail |
| Bright bump with intact pores | Local Burn outside FS | Darken the bump; keep the texture |
| Uneven makeup edge | Healing for edge, Smoothing for color | One defect, two scales |
That table will solve most layer hesitation. The remaining cases depend on one control: radius.
Radius decides what “high” and “low” mean
Frequency is scale, not a type of object.
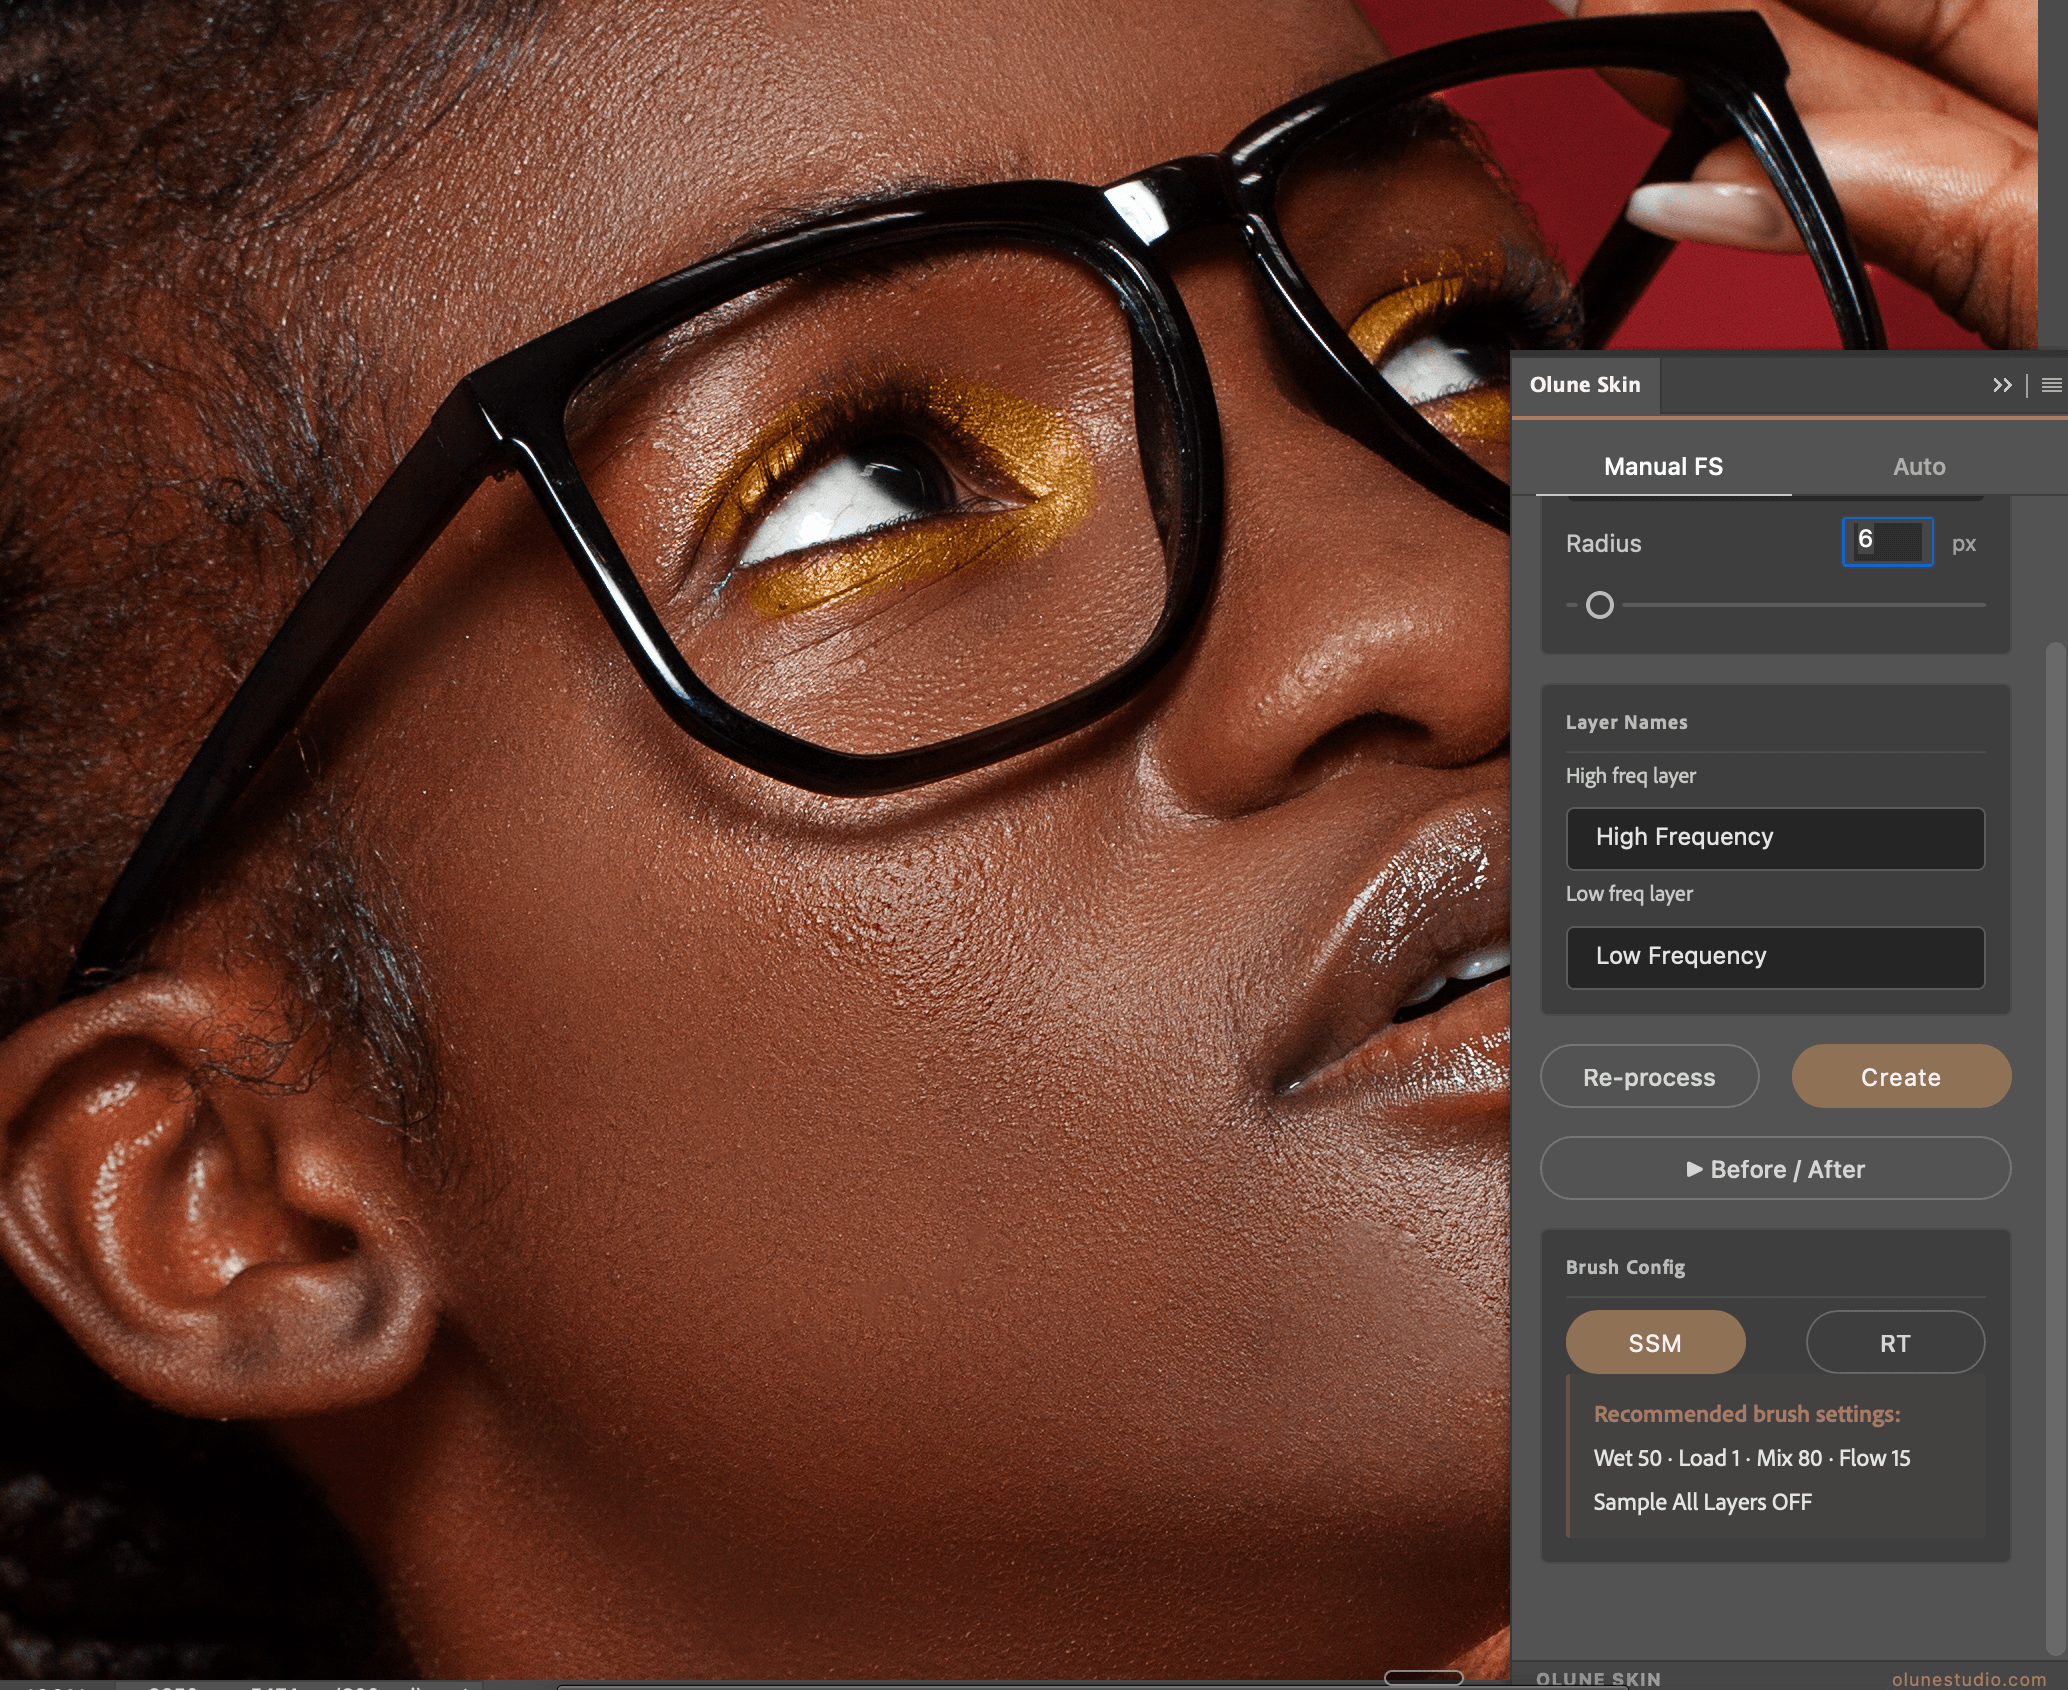
A pore changes from light to dark over a tiny distance, so it usually lands on high frequency. The cheek highlight turns into shadow over a much larger distance, so it lands on low frequency. Medium-sized information — wrinkles, larger pores, under-eye lines, makeup buildup — can move between the layers depending on your radius.
Olune Skin gives you a 1–100 px range and Re-process, which means you can test the separation without starting again.
Use the low-frequency preview:
- Raise the radius until fine pores disappear.
- Stop before important facial edges dissolve.
- Recombine the stack and confirm it matches the untouched image.
If the radius is too small, texture stays on low and smears during Smoothing. If it is too large, facial form moves to high and gets damaged during Healing.
There is no winning number. There is only a useful boundary for this photograph.
See the boundary instead of guessing it
Try Olune Skin free for 14 days, switch between Gaussian, Surface, Median, and 2× Median, then use Re-process on the same portrait. No card required.
High frequency: think smaller than your brush wants to be
High frequency carries pores, fine lines, short hairs, and sharp edges.
Use Olune Skin’s Healing control for isolated texture damage. Sample close to the defect and keep the brush slightly larger than the problem. The cheek, forehead, nose, and jaw have different pore patterns; they are not interchangeable texture banks.
If your brush becomes large, stop. Zoom out. A defect that remains obvious from a distance probably contains low-frequency color or luminosity too.
Protect eyelashes, lip edges, nostrils, hair, and jewelry. They also live on high frequency, and broad cloning softens them quickly.
Low frequency: follow the face, not the shortest path
Low frequency carries broad color and gradual light transitions.
Use Smoothing for redness, cool shadow contamination, uneven foundation, or a patch that stays visible when you zoom out. Work in short SSM brush strokes and remain inside one facial plane.
Do not drag cheek color through the nose shadow. Do not blend a highlight into the jaw. Even color is not worth a flat face.
Olune’s skin selection helps contain the work, but the independent mask determines where the correction actually belongs. Paint only the problem.
Middle frequency: split the defect into parts
This is where frequency separation earns its place.
A raised blemish can contain:
- Broken pores on high frequency
- A red halo on low frequency
- A bright center and dark rim best handled with dodge and burn
Three components. Three small corrections. One believable result.
Trying to remove everything with a single Healing Brush click usually creates a soft patch. Smoothing everything usually leaves strange texture. Olune Skin keeps the workspaces close so moving between them does not interrupt the retouch.
Which Olune filter should you choose?
Gaussian Blur is predictable and a strong starting point for most portraits.
Surface Blur protects stronger edges and can help when facial boundaries need extra care.
Median can produce a smoother, more graphic low-frequency base for certain uneven patterns.
2× Median pushes that smoothing further. Treat it as an option, not an upgrade.
Compare the nose, eyelids, lips, and hairline before deciding. A filter that makes the cheek easy but damages every edge is not saving time.
The 10-second decision rule
When you hesitate, change the zoom:
- Disappears quickly when zooming out? Start with Healing / High.
- Remains visible from a distance? Start with Smoothing / Low.
- Reads as a bump, hollow, or light break? Use Dodge & Burn.
- Looks too soft after correction? Use Reveal Texture or reduce the mask.
That is the whole cheat sheet.
Olune Skin handles the repetitive stack, filters, brushes, selection, and masks. You handle the scale and the finish.
Download the complete 14-day trial and keep this table beside Photoshop for the first three portraits. By the fourth, choosing the right layer should feel automatic — without making every face look automated.